invinityads

Rabu, 29 Juli 2009

Vibrance Adjustment in Photoshop CS4

Photoshop CS4 has a new adjustment called Vibrance. It is not found even in PS CS3. This is something exclusive to PS CS4. The Vibrance adds vibrance just as its name says to areas in your photos without affecting the rest of the image.
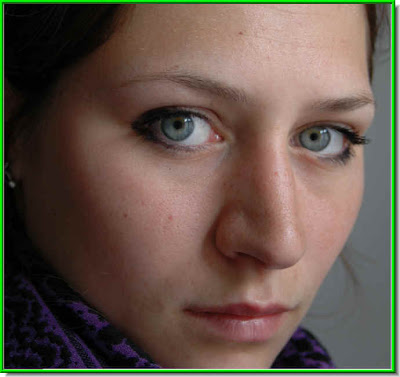
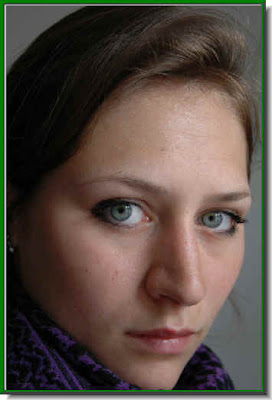
This a free stock photo to which I will add a Vibrance adjustment. I will make the eyes and lips look more vibrant, while keeping the other color information in the photo unchanged.

The Vibrance adjustment has been added to the eyes and lips. Compare it with the photo above and you can see the difference.

The tutorial is here.

Other Photoshop tutorials are here for all versions. Click here.

Senin, 27 Juli 2009

Smoke Brushes

May be you have wondered sometimes how to create smoke in Photoshop and found it to be beyond you. Don't bother. I will how you how to make realistic smoke for use in your photos and none will be able to tell the difference.

I have used this free stock photo.

And here is the smoke. You will be able to do it too. You don't need to be an expert.

See the tutorial here.

Other photoshop tutorials are here.

Selasa, 21 Juli 2009

Median Filter - Smoothen Skin in Photoshop

Sometimes the skin shows up as rough in a photograph. The best to smoothen rough skin in Photoshop is to use the Median Filter which does not blur out edges.

Here is a free stock image that I have opened in Photoshop.

A closeup showing the rough skin smoothened in Photoshop.

The tutorial is here.

Other photoshop tutorial are here.

Jumat, 17 Juli 2009

Red Eye Removal with Photoshop CS

Sometimes a photo taken with a flash can be perfect, yet a red eye mars the effect. It is a common enough problem. This can be easily removed in a couple of steps only in Photoshop CS.

A photo with a red eye.

The same photo with the red eye removed.

The tutorial is here.

Other Photoshop tutorials are here.

Selasa, 14 Juli 2009

3D in a jiffy in Photoshop

You can easily make a 3D effect with Photoshop with two ordinary images. It is very easy to do and can be done in any version of Photoshop.

I have taken this image of a laptop.

And this photo of a boy running.

And this is my 3D image! You too can do it.

The tutorial is here.

Other photoshop tutorials are here.


Jumat, 10 Juli 2009

Liquify Filter in Photoshop

The Liquify Filter is an amazing Tool in Photoshop. You can literally do cosmetic surgery with it. You can shed pounds from a figure and add more curves at will.

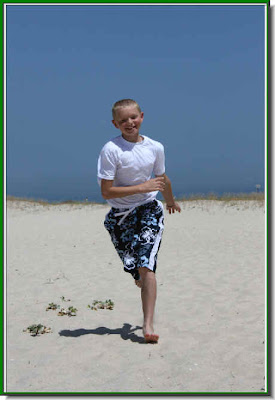
This is a photo I have opened up in Photoshop.
The same photo after cosmetic surgery with the Liquify Tool -- the waist is thinner, the thighs are slimmer and the bust is more attractive.

The Photoshop tutorial is here.

Other Photoshop tutorials are here.

Rabu, 08 Juli 2009

Blurring out Background Radial Blur

Sometimes the photo of your subject may be excellent, while the background is poor. What do you do? Use the Radial Blur in Photoshop and a Layer Mask to get rid of the background.

I took this photo of a kitten with my mobile camera. The background spoils the photo.

The background has been blurred out and the focus is now entirely on the kitten. It is very easily done.

The Photoshop tutorial is here.

Other Photoshop tutorials are here:

Minggu, 05 Juli 2009

Sunglass Reflection Pen Tool Paths

If you are lucky you can photograph a reflection appearing in a sunglass. But it depends on luck and your camera. You can easily create this effect artifically in any version of Photoshop.

I have taken this free stock photo.

And this one.

And created this. You can too very easily.

The Photoshop tutorial is here.

Other Photoshop tutorials are here.