invinityads

Kamis, 30 Desember 2010

Pencil and Notepaper in Photoshop

You can make realistic Notepaper in photoshop as also a Pencil from scratch. It is not difficult, but will take a bit of time.
Here is the Notepaper and Pencil which I will teach to make.
The tutorial is here
Other photoshop tutorials are here 


Minggu, 26 Desember 2010

Part Sketch Part Real in Photoshop II

You can turn a portion of an image into a sketch, while retaining part of the real image. You can do this in any version of Photoshop. 
I have opened this free stock image.
The part sketch, part real.
The tutorial is here
Other photoshop tutorials are here


Clock Face

With New Year due in a few days the count down will begin for 2011. So I will show you how to make a clock from scratch in Photoshop.
The clock
Something more you can do with the clock.
The tutorial is here


Sabtu, 25 Desember 2010

High Key image in Photoshop

A high key image is done with lights in a studio, though I have seen quite a few shot outdoors. It can be replicated to quite some extent in photoshop.
I have chosen this free stock image.
The same image after applying the high key effect in photoshop.
The tutorial is here 
Other photoshop tutorials are here


Selasa, 21 Desember 2010

High Pass and Desaturation

Use High Pass after desaturating an image together with Hue/Saturation in Photoshop.
This is a free stock image.

The same image after processing.
The tutorial is here
Other photoshop tutorials are here


Senin, 20 Desember 2010

Vintage Effect and Color

You can tint a color image and then restore color in a portions of the image you want in Photoshop.
I have chosen this free stock image.
The same image after adding the tint and selectively revealing the color and also changing it,
The tutorial is here
Other photoshop tutorials are here


Minggu, 19 Desember 2010

Motion Blur, Radial Blur and Polar Coordinates

This is a simple tutorial on using the Motion Blur, Radial Blur and Polar Coordinates together in Photoshop.
This is a free stock image.
The same image with the filters applied. It can be done in any version of Photoshop and is easy to do.
The tutorial is here
Other tutorials are here


Jumat, 17 Desember 2010

Cross Processing background

There is technique that photographers use to keep the image in sharp focus, while blurring out the backgound and also lightening for the focus to be fully on the image. This can be replicated in Photoshop.
I have used this free stock image.

The same image after cross processing the background.
The tutorial is here
Other photoshop tutorials are here


Senin, 13 Desember 2010

Brushes in Photoshop

There are many things that can be done with a Brush beside painting. Besides the Brushes that you use, there are many other sets in Photoshop. You can also download and install free, good quality brushes. I will show you how to do it in a very easy way.
This is what I aim to create with downloaded Brushes. You can do it too.
The tutorial is here 
Other photoshop tutorials are here 


Minggu, 12 Desember 2010

Christmas Card Again

This is another Christmas Card tutorial with baubles or glass bulbs used to decorate Christmas trees with. I have been particularly detailed to help those new to photoshop to do something ambitious.
You can do a card like this if you want. The tutorial is here
Other Photoshop tutorials are here


Jumat, 10 Desember 2010

Christmas Card in Photoshop

With Christmas at hand it is time for Christmas cards. You can make one yourself in Photoshop, any version. You can personalise it with Text of your choice and surprise friends and those you care for.
This is Christmas Card made from scratch in Photoshop. You can do it too.
The tutorial is here
Other photoshop tutorials are here


Senin, 06 Desember 2010

Cross Processing in Photoshop

Cross processing is a technique by using chemicals wrongly on negatives. They produced startling effects which caught on. You can replicate it in photoshop. There are many ways people cross process an image. I have shown how I have done it.
This is a free stock image.
The same image after cross processing.
The tutorial is here
Other photoshop tutorials are here


Minggu, 05 Desember 2010

Extract Filter and Mask

The Extract Tool is fun to use to extract an image from its background, especially those who have a horror of the Pen Tool
The problem with the Extract Filter is that it leaves behind jagged edges, removes portions that you want to keep or keeps portions you don not want. This tutorial will show you how to extract an image perfectly from its background with Extract. It can be done in any version of Photoshop.
This is a free stock image.
The image extracted.
Placed on a white background
And placed on a different background.
The tutorial is here
Other photoshop tutorials are here


Senin, 29 November 2010

Text -- Grass Text

Making Grass Text is quite simple. You need a free stock image of grass and a Brush found in all versions of Photoshop to make the Text.
The Grass Text.
The tutorial is here
Other Photoshop tutorials are here


Minggu, 28 November 2010

Silhouette Paste Into

You can use a silhouette and paste any image into it in any version of Photoshop.
I have used a free brush for the silhouette.
And this free stock image to Paste Into.
The final image.
The photoshop tutorial is here
Other photoshop tutorials are here


Jumat, 26 November 2010

Color to single tone in photoshop

Desaturating an image is simple. Just press CTRL+SHIFT+U. You can also colorize it with Hue/Saturation. But your choice is limited. What do you do when you want to change a color image to a single color of your choice? It's very simple and can be done in any version of Photoshop.
Here is a free stock image.
The same image with a single tone.
The Photoshop tutorial is here
Other photoshop tutorials are here


Kamis, 25 November 2010

Mono Color in Photoshop

Keep a portion of an image in color and while changing the remaining portions to mono color. It is easy and can be done in any version of photoshop.
This is effect you will get. The tutorial is here
Other photoshop tutorials are here


Senin, 22 November 2010

Series of Images fading out

You can create a series of images fading out gradually from a single image in any version of Photoshop.
This is the effect achieved.
The tutorial is here
Other photoshop tutorials are here


Minggu, 21 November 2010

Mono Color image

You can change any color image to a mono color in any version of Photoshop.
This is a free stock image.
The same image turned to mono color and a few other easy effects added. The tutorial is here
Other photoshop tutorials are here


Jumat, 19 November 2010

Color photo with desaturated border in Photoshop

Here is a simple tutorial which can be done in any version of Photoshop. The intention is have the image in color at the centre, while desaturating the rest of the image so that it looks like it has a desaturated border.
I will use this free stock image to demonstrate how the effect will look like.
This is the same image with a desaturated border.
The tutorial is here
Other photoshop tutorials are here


Rabu, 17 November 2010

Displacement Map Again in Photoshop

I have earlier shown the Displacement Map in Photoshop. This is a more detailed tutorial on making one.
I have taken this free stock image.
I have added Text and displaced it with a Displacement Map i.e. the Text follows the contours of the sand.
The tutorial is here
Other photoshop tutorials are here


Selasa, 16 November 2010

Lomo effect with Photoshop

The Lomo effect is a camera effect which has a vignette and vibrants colors. It can also be imitated in photoshop.
I have chosen this free stock image.
The same image with the Lomo effect.
The tutorial is here
Other photoshop tutorials are here


Minggu, 14 November 2010

Face Shatter in Photoshop

A face shatter effect can be done is various ways. This is my way of doing it. It just takes time. It can be done in any version of Photoshop and is easy to do.
I have used this free stock image.
The face shatter effect.
The tutorial is here 
Other photoshop tutorials are here


Shatter Effect in Photoshop

You can shatter an image in many ways in photoshop. This is a way I prefer. It takes time, but you get a very good effect. It can be done in any version of Photoshop.
Here is the effect.
The tutorial is here
Other photoshop tutorials are here


Sabtu, 13 November 2010

Photoshop makeover tutorial

Here is a step by step tutorial on makeover in Photoshop. It should be possible in all versions. You will find methods here that the experts use. You can do it too by following this tutorial step by step. Save your work as a psd file after each part and continue with the next part. If you find the psd file becoming too large, flatten the layers and continue with the next part.
This is the image I will be using for the makeover in Photoshop.
The same image after the makeover.
The first part of the tutorial  on fixing the skin is here
The second part on adding a Blush is here
The third part of the tutorial improving the eyes is here
The fourth part of the tutorial adding an eyeshadow is here
The fifth part on eye lashes is here 
The sixth part is on eyebrows. It is here
The seventh and last part on contouring, fixing the nose and lips is here


Photoshop Makeover Part 7 Last

This is 7th and last part of the image makeover tutorial. Here we will do a bit of contouring and fix the lips. The last tutorial is here
This is how the image looks like so far.
This is how the Layer pallete looks.
Step 1 : Press CTRL+SHIFT+ALT+E to make a new composite layer -- Layer 20.
Step 2 : Press CTRL+J to duplicate Layer 20. A new Layer 20 is formed.
Step 3 : Zoom in on the image. We will will be contouring it first.
 
Step 4 : Click on the Burn Tool.
 
Step 5 : In the top panel Range is set to Midtones. Lower the Exposure to 9% and ensure that Protect Tones is checked.
Step 6 : Click in the top panel. (The Burn Tool Works like a Brush). Set the Hardness at 0.
Step 7 : Make the Brush large.
Step 8 : Since the Exposure is set way down, you will have to go over the edges of her face before you notice the effect with the Burn Tool.
Step 9 : Reduce the Opacity of the Layer.
This is how the image looks. Her face looks a bit narrower after the contouring.
Step 10 : Press CTRL+SHIFT+ALT+E to make a new composite Layer 21.
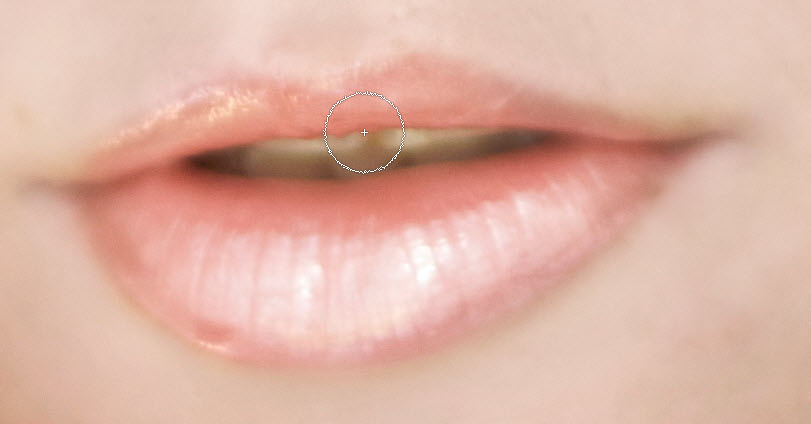
Step 11 : Zoom in on the lips.
Step 12 : Click on the Burn Tool.
Step 13 : In the top panel the settings were given in the earlier step. We will be using them again for this step.
Step 14 : Go over the edges of the lips with the Burn Tool a number of times.
Step 15 : Go over the inside of the lips a few times.
Step 16 : Now Switch over to the Dodge Tool.
Step 17 : The Settings for it in the top panel will be the same.
Step 18 : Go over the highlights of the lips with the Dodge Tool as also the teeth.
Step 19 : Click the Layer Mask button. A Layer Mask forms on Layer 21.
Step 20 : Switch the Foreground Color to Black.
Step 21 : Press b to bring up the Brush Tool. Use a soft brush to wipe around the edges of the lips where some of the burning and dodging could have spilled over on the skin.
This is how the image looks so far.
Step 22 : Press CTRL+SHIFT+ALT+E to make a new composite Layer 22.
Step 23 : Press CTRL+J to duplicate Layer 22 into Layer 22 copy.
Step 24 : Go to Filter>Liquify.
Step 25 : When the Liquify dialogue box opens. I have made the Brush really large, while keeping the Brush Density at 50 and Brush Rate at 80.
Step 26 : Click the Bloat Tool in the left panel.
Step 27 : Click once (at the most twice) with the Bloat Tool on the pupil. The eye will become larger.
Step 28 : Do likewise with the Bloat Tool on the other eye.
Step 29 : Click the Forward Warp Tool.
Step 30 : Tuck in the nose with little movements of the Forward Warp Tool to make the nose look thinner.
Step 31 : You can touch up the lips too. That is all.
This is the image I started with.
The same image after the Makeover. Hope you enjoyed it.
I know I did.