
Step 2 : Make sure that your Foreground Color is set to Black and Background to White. If it is not, press 'x' and then 'd' on your keyboard to set them to the default colors.

Step 3 : Press ALT+D. This will fill the blank white document with the Foreground Color which is Black.
Step 4 : Now click the New Layer icon shown by the small white hand and a new layer -- Layer 1 forms over the Background layer. Note that it is highligted,which means we are working on that layer.

Step 5 : Press 'x' on the keyboard and the Foreground Color is now White. Step 6 : Click the Brush Tool to select it.
Step 7 : Click where the white arrow points to reveal the Brushes pallette.

Step 8 : The Brushes pallete is revealed. You have to click on a Brush to select it for use. I have clicked on Brush no 65 a soft Brush.
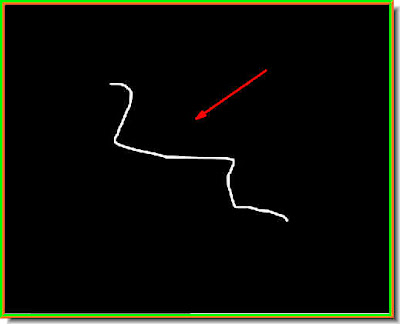
Step 9 : Draw a line with the brush. You do not have to be accurate at all. In fact, the above was all I could manage to do.
Step 10 : Click on the Add Layer Style button shown by the arrow. (In PS7 it looks a bit different, but is in the same place).
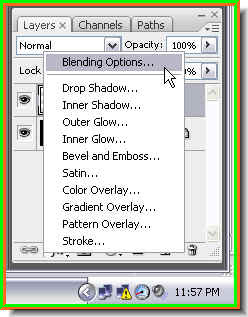
Step 11 : As you soon as you click the Add Layer Style button, the above popup appears. Click on Blending Options.
Step 12 : As soon as you click Blending Options the Layer Style dialogue box opens.
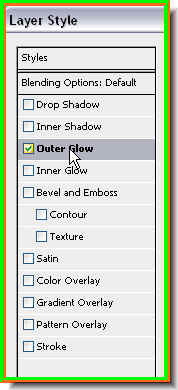
Step 13 : In the left panel of the Layer Styles click on Outer Glow. Click where the arrow points to. This will reveal the Outer Glow controls at right. Step 14 : This is the default Outer Glow controls.
 Step 15 : Click on the Yellow square. This will reveal the Color Picker.
 Step 16 : Now look at the red arrow at the bottom. It points to a slider. Drag the slider to the top. The colors in the middle is called the Spectrum. You can choose a color by dragging the slider to a particular color. Drag the slider to the top of the Spectrum to choose the Red.

Step 17 : I have dragged the slider to the very top.

Step 18 : Now click on a bright Red. Click ok in the Color Picker.
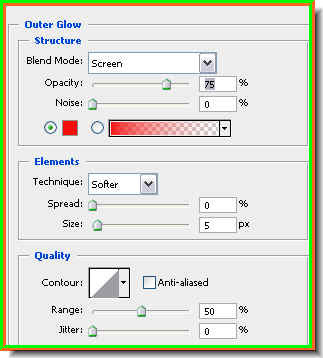
Step 19 : This is how the Outer Glow dialogue box looks after you click ok in the Color Picker.
Step 20 : Click where the red arrow points to. This will reveal a dropdowp menu. Select Hard Light from it.

Step 21 : Now drag the Opacity slider all the way to 100%. I have dragged the Size slider to 20 pixel. DO NOT CLICK OK IN THE LAYER STYLES dialogue box as yet.
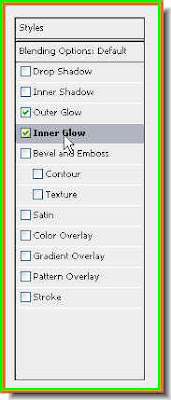
Step 22 : Now click on the Inner Glow where shown by the arrow. This will open the Inner Glow controls at right. Step 23 : Again click the yellow color box. This will bring up the Color Picker. Drag the Spectrum to the Orange at the the bottom.
Step 24 : Drag the slider to the Orange, then click on the shade of orange at the top in the box. Click ok in the Color Picker.
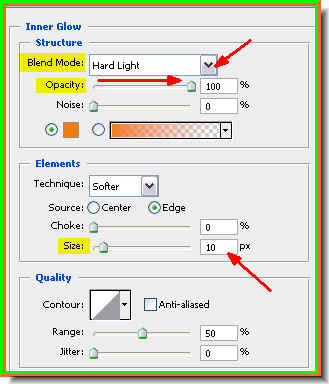
Step 25 : Now change the Blend Mode in the Inner Glow controls to Hard Light from the Dropdown menu. Drag the Opacity slider to 100%. I have dragged the Size slider to 10 pixels.
Click Ok in the Layer Styles dialogue box.
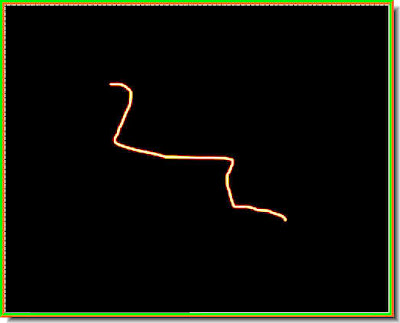
Step 26 : This is how the squiggle I drew with the Brush Tool now looks.
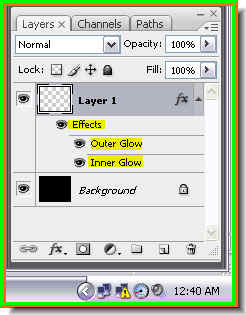
Step 27 : Look in the Layers pallette. You can see the Layer 1 and the Layer Styles that have been added below it. (In PS7 you will not be able to see the Layers Styles)
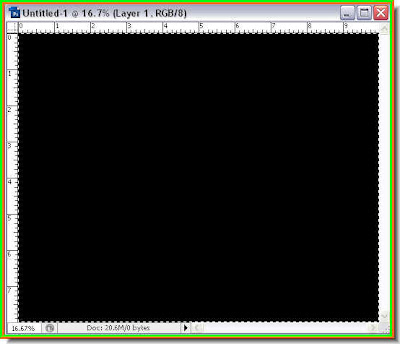
Step 28 : Press CTRL+A+Delete. The line disappears. You will also find a line of 'marching ants' all around the corners of the image.
Step 29 : Look in the Layers pallette. The Layer 1 layer thumbnail has been filled with Black.

Step 30 : Now hit the Delete key again. The Black fill disappears.

Step 31 : Press CTRL+D. The 'marching ants' around the edges of the image disappears.
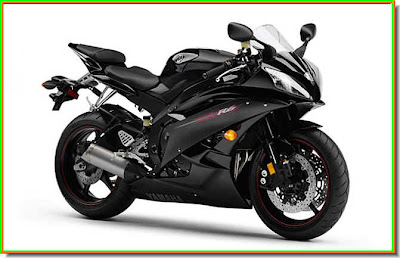
Step 32 : I have now opened this image of a motorbike. I will make a brush out of it. Note that the image has a white background. If you choose an image which has other objects, it will be included in the brush. In such a case it would be best to cut out the portion you want to make into a brush and paste it on a white background.
Step 33 : Click on the Rectangular Marquee Tool to select it.

Step 34 : I have drawn a selection around the bike with the Rectangular Marquee Tool.

Step 35 : Go to Edit>Define Brush Preset.

Step 36 : The Brush Name dialogue box pops up. I have named my brush Motorcycle. Click ok. I will minimise the bike image because I do not need it anymore.

Step 37 : Click on the Brush Tool again.
Step 38 : Click where the white arrow points to in the top panel to reveal the Brushes.

Step 39 : The Brush presets are now visible.

Step 40 : I have scrolled down to the bottom of the Presets. The Motorbike brush is the last preset. Click on it to select it.

Step 41 : I have clicked with the Motorbike brush on the layer. What do you notice? The brush has taken on the Layer Styles that we worked on earlier. To make the brush bigger use the ] (right) bracket key and to make it smaller the [ (left) bracket key. This is a shortcut to make the brushtip bigger or smaller. Step 42 : Now CTRL+Click the layer thumbnail of Layer 1.
Step 43 : Now click on the Add Layer Mask button and a Layer Mask forms next to the Layer thumbnail on Layer1.

Step 44 : And this is how the image looks now.
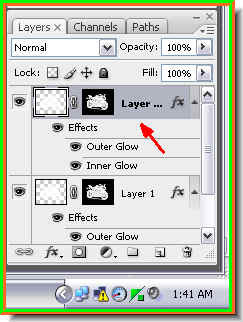
Step 45 : Press CTRL+J. This will duplicate Layer1. Step 46 : Now click directly on the layer mask in the duplicate layer. As soon as you click on the layer mask you will notice a border forms around it. This indicates that only the layer mask is selected. Now drag it down to the trash at the botom.
I am in the process of dragging the layer mask to the trash can.

Step 47 : When you drag the layer mask to the trash can, this dialogue pops up. Click on Apply.

Step 48 : Click on the Smudge Tool.
Step 49 : In the top panel set the Strength to 75%.
Step 50 : I have added little streak with the Smudge Tool for effect.
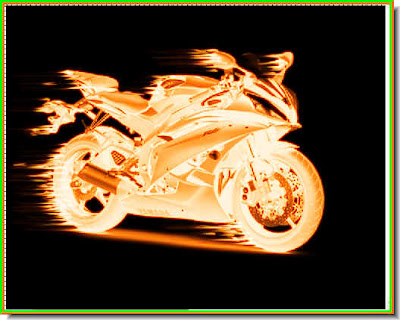
I have added more streaks with the Smudge Tool to make it look fiery. It depends on the effect you want. That is all. Try it out.
Tidak ada komentar:
Posting Komentar