I was sitting down with a Sunday newspaper when I saw a particular effect, which was part vignette, part something else which I could not put my finger on. I thought I would try it and was able to work it out. And improve on it too.
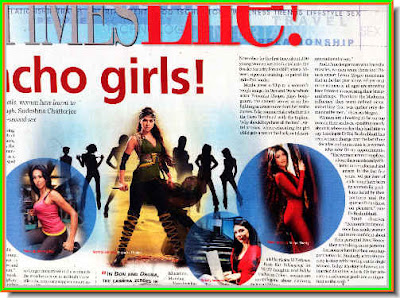
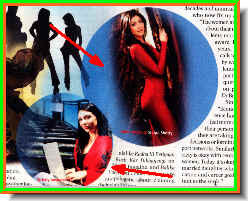 This is the effect I saw in the newspaper illustration. I scanned it on my flatbed for this tutorial. Note that the circles are not exactly vignettes. The inside has been filled with color.
This is the photo I will be using for the tutorial. It is a free stock photo and can be downloaded here. It has been downloaded from http://www.sxc.hu/index.phtml
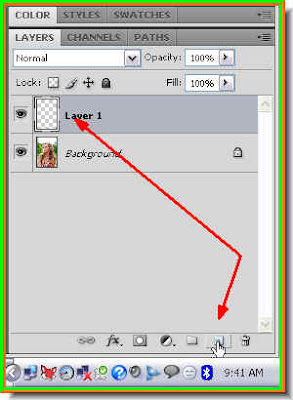 Step 1 : In the Layers pallette click on the new layer icon shown by the small white hand a new layer -- Layer 1 forms above the Background layer.
 Step 1 : In the Layers pallette click on the new layer icon shown by the small white hand a new layer -- Layer 1 forms above the Background layer.
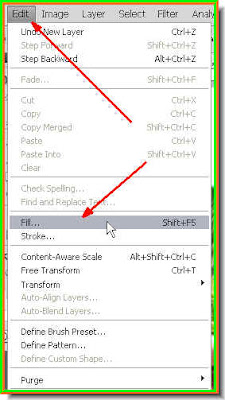 Step 2 : Go to Edit>Fill.
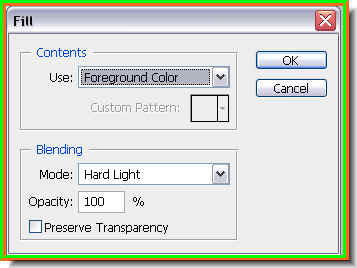 Step 3 : The Fill dialogue box opens.
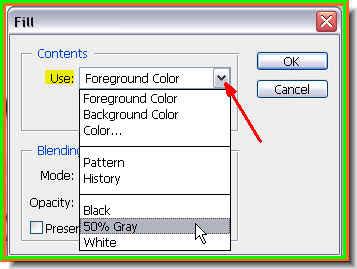 Step 4 : Click where the red arrow points to reveal a dropdown menu. Click on 50% Gray. Then click ok.
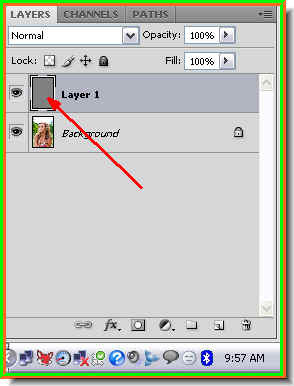 Step 5 : Note that the Layer 1 has been filled with 50% Gray.
 This is how the image looks. It has been completely filled with 50% Gray.
Step 6 : Click the Add Layer Mask radio button on the bottom of the Layers pallette and a Layer Mask forms next to the Layer thumbnail on Layer1.
 Step 7 : Click the Brush Tool from the flyout on the tool pallette on the left.
 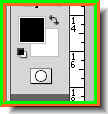 Step 8 : Make sure the Foreground is set to Black and the Background to White. If it is not press 'x' and then 'd' on your keyboard.
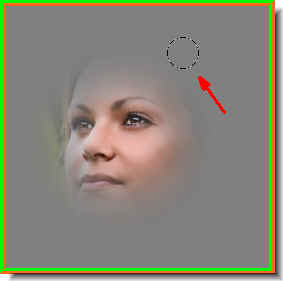 Step 9 : With the Brush Tool I am gently wiping away the gray fill. To make the Brush tip bigger use ] (the right bracket key) and to make it smaller [ (left bracket key). To make the Brush tip hard press Shift+] (right bracket key) and to make it soft Shift+[ (left bracket key). Remember these shortcuts.
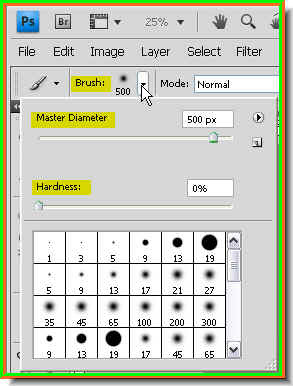 You can also set the size and harness/softness of the brush tip from the top panel. Click where the white arrow points to and it will reveal the Brushes menu. The Master diameter is for setting the size of the tip -- big or small and the Hardness to make it hard or soft. You have to drag the sliders. You can also choose a preset from the bottom for a hard or soft brush. The bracket key shortcuts are better though. I have used a very soft and large brush.
 Step 10 : I have brushed away the gray to reveal part of the image. Notice I have chosen to hide most of the background.
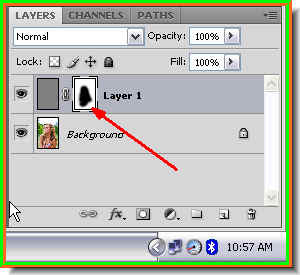 You can see where I have brushed on the Layer Mask in the Layers pallette.
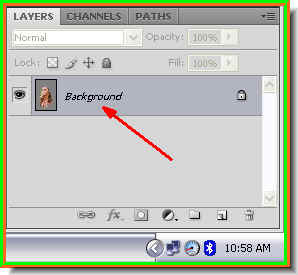 Step 11 : Press CTRL+E to merge the layers. The layers merge into a single layer -- Background layer.
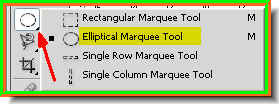 Step 12 : Click on the Elliptical Marquee from the flyout.
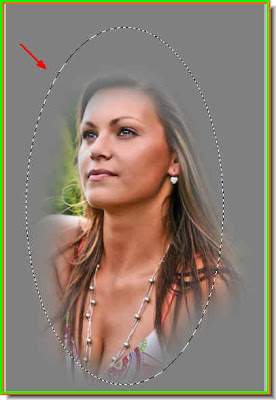 The selection formed by the elliptical Marquee Tool.
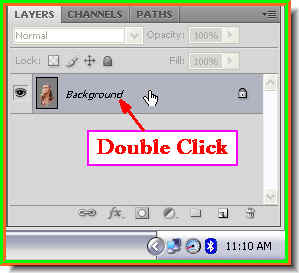 Step 13 : Double click the Background layer. A Background layer is uneditable.
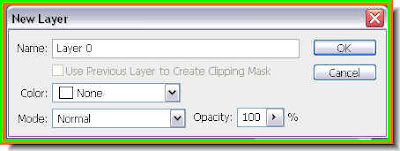 Step 14 : The New Layer dialogue box pops up. Click ok.
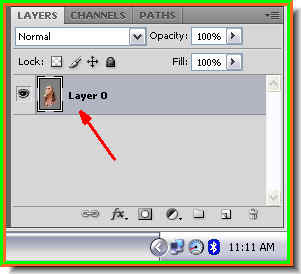
Step 15 : The Background layer turns to Layer 0. It is now editable.
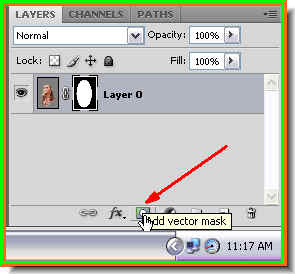 Step 16 : Now click the radio buton on the bottom of the Layers pallette and a Vector Mask forms next to the layer thumbnail.
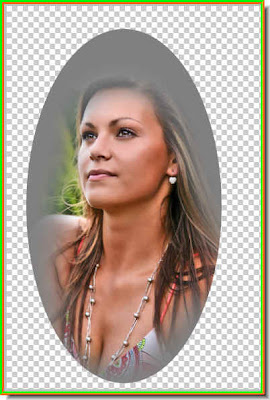 This is how my image looks.
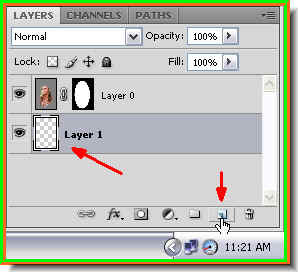 Step 17 : Press CTRL and click on the New Layer button. A new layer will form below Layer 0.
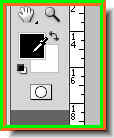 Step 18 : Click on the Foreground color. The cursor will change to an eyedropper.
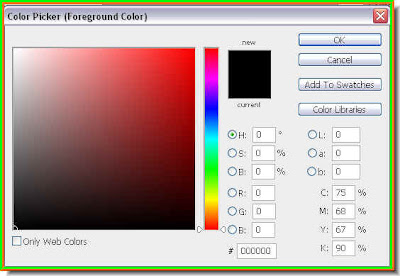
Step 19 : As soon as click on the Foreground Color the Color Picker opens.

Step 20 : Hover the cursor over the image at the bottom. It changes into an eyedropper. Whichever color you select on the image will be selected. I have clicked on the brown hair.
 Note that the Foreground color has changed to the color I picked i.e. of the hair.
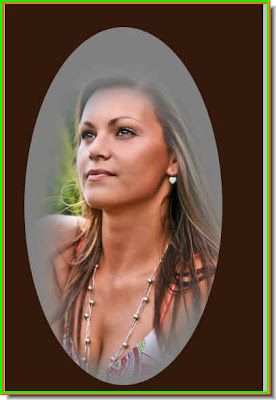
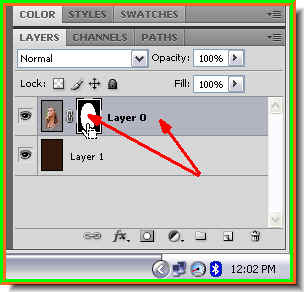 Step 22 : Click back on Layer 0 and click on the Layer Mask. This will select it.
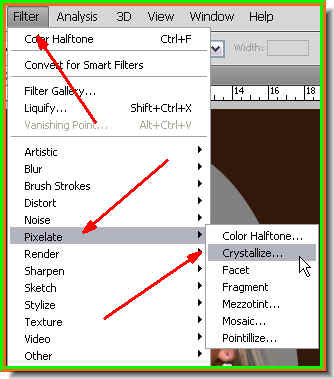 Step 23 : Go to Filter>Pixellate>Crystallize.
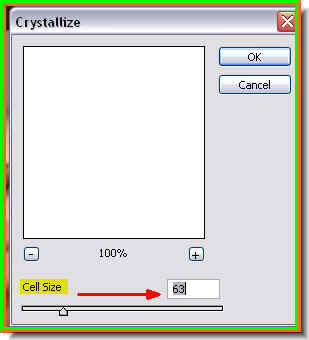 Step 24 : The Crystallize dialogue box opens. You have to set the Cell Size. I have dragged the slider to over 60 since I am using a high resolution image. If you are using a low resolution one leave it at between 5 and 10. You can always experiment offcourse.
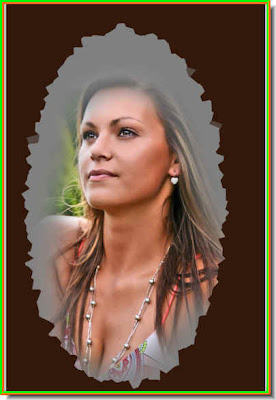
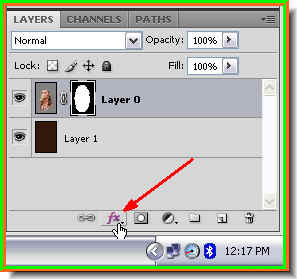
There is no end to what you can do know in adding effects. I will show how the Stroke can be applied to this. Click the Add New Layer Style radio button. It looks a bit different in Photoshop7, but is in the same place.
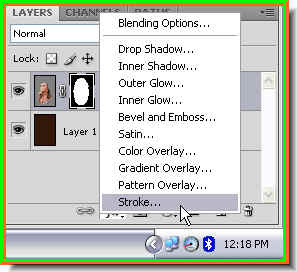
Step 25 : When you click the Add Layer Styles button, a small popup appears. From it click on Stroke.
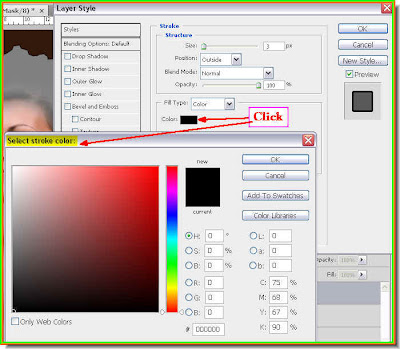
Step 26 : This opens the Layers Styles/Stroke dialogue box. Click the box marked Color. The default is usually set to Red. When you click on Color it will open the Select Stroke Color dialogue box.
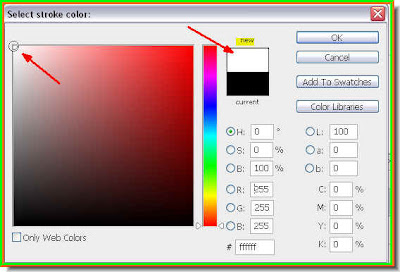
Step 27 : Now click on the extreme top left. This will select a shade of White. You can click any color you wish by moving the slider at the bottom of the Spectrum in the middle. When I click on the White the 'New' changes to the shade I picked. Click Ok in the Select Stroke Color dialogue box.
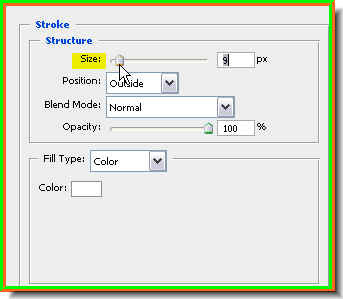
Step 28 : Now drag the Size slider in the Stroke dialogue box. It will depend on how thick you want the Stroke to be. You can see the effect in your image as you drag the slider. Click ok when satisfied.
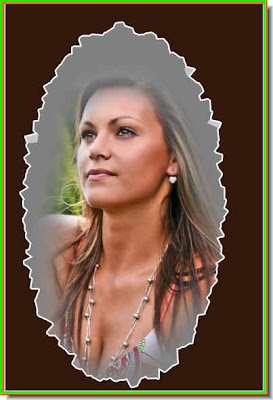
This is my effect.
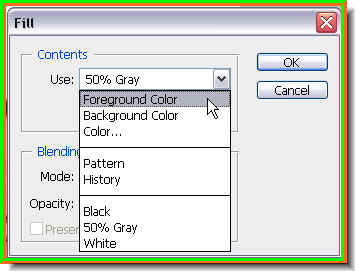 Step 29 : As I said there is no end to what you can do for adding effects. For example, In Step 2, instead of choosing 50% Gray, you can choose the Foreground color. Then as in Step 20 pick a color from the image.
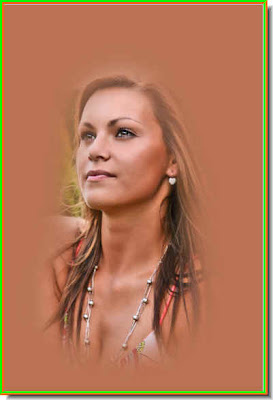 Step 30 : I have clicked a color from the image and filled in Layer 1 as in Step 21.
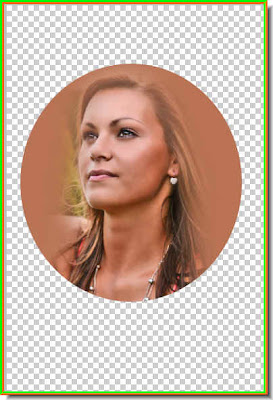 Step 31 : As in Step 16 I have obliterated the background which is now transparent.
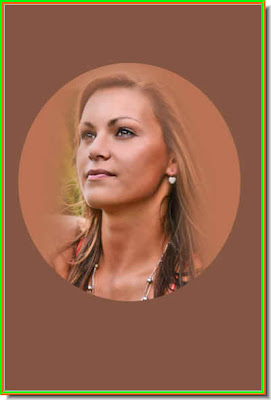 Step 32 : I pressed ALT+Backspace to fill Layer 1 with the Foreground Color.
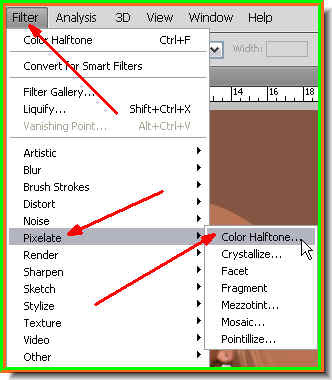 Step 33 : As in Step 23 and Step 24 Go to Edit>Pixellate, but this time choose Color Haltone.
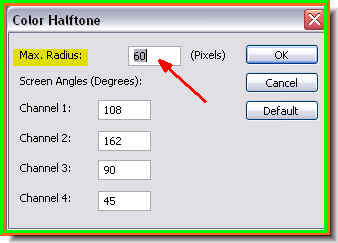 Step 34 : Set the Max Radius suitably. This is a high resolution image so I have set it very high. For a low resolution image set it at between 5 and 10.
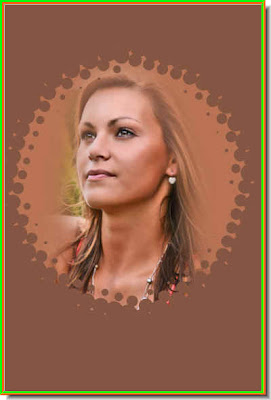 This is the effect I get.
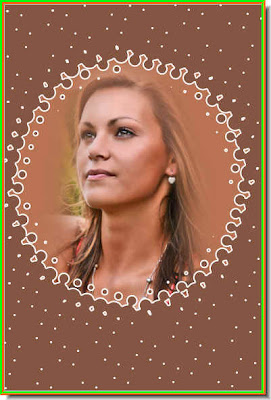 Step 35 : Add a Stroke. And there you are. Happy experimenting.
Tidak ada komentar:
Posting Komentar